Difference between pages "MCLA Remote Access (Windows)" and "Registering your MCLA ID BlazerPrint"
(Difference between pages)
(→Download and Install Sophos Connect Software) |
|||
| Line 1: | Line 1: | ||
| + | Every BlazerPrint copier is equipped with an RFID reader that is compatible with your MCLA Photo ID. Users can login to the copier using their MCLA Photo ID to unlock the ability to release their print jobs from the BlazerPrint virtual print queue as well as use scanning, copy and fax features. Users must 'register' their MCLA Photo ID with the BlazerPrint system. '''This only needs to be done once to associate the card with your MCLA account for authentication purposes'''. Here are the steps on how to register your card. | ||
| − | |||
| − | + | *1. 'Tap' your MCLA Photo ID on top of the RFID Reader on the Copier. | |
| − | + | [[image:printreg1.jpg]] | |
| − | + | *2. You will be prompted to “Associate your Card”. | |
| − | + | [[image:printreg2.jpg]] | |
| − | + | *3. Select the “Yes” button in the right-hand corner to begin registration. | |
| − | *1. | + | [[image:printreg3.jpg]] |
| − | + | *4. You will be prompted to enter your MCLA User ID (A number without @mcla.edu) and Password. | |
| − | + | [[image:printreg4.jpg]] | |
| − | + | *5. Hit the “Done” key in the right-hand corner after each item is entered. | |
| − | + | *6. Once complete your card will be “successfully registered”. | |
| − | + | *7. If the information you entered is not correct you will be prompted to try again. | |
| − | |||
| − | |||
| − | |||
| − | |||
| − | |||
| − | |||
| − | |||
| − | |||
| − | |||
| − | |||
| − | |||
| − | |||
| − | |||
| − | |||
| − | |||
| − | [[ | ||
| − | |||
| − | *2. | ||
| − | |||
| − | [[ | ||
| − | |||
| − | *3. | ||
| − | |||
| − | [[ | ||
| − | |||
| − | *4. | ||
| − | |||
| − | |||
| − | |||
| − | |||
| − | |||
| − | [[ | ||
| − | |||
| − | * | ||
| − | |||
| − | |||
| − | |||
| − | |||
| − | |||
| − | |||
| − | |||
| − | |||
| − | |||
| − | |||
| − | |||
| − | * | ||
| − | |||
| − | |||
| − | |||
| − | |||
| − | |||
| − | |||
| − | |||
| − | |||
| − | * | ||
| − | |||
| − | |||
| − | |||
| − | |||
| − | |||
| − | |||
| − | |||
Revision as of 03:09, 9 February 2023
Every BlazerPrint copier is equipped with an RFID reader that is compatible with your MCLA Photo ID. Users can login to the copier using their MCLA Photo ID to unlock the ability to release their print jobs from the BlazerPrint virtual print queue as well as use scanning, copy and fax features. Users must 'register' their MCLA Photo ID with the BlazerPrint system. This only needs to be done once to associate the card with your MCLA account for authentication purposes. Here are the steps on how to register your card.
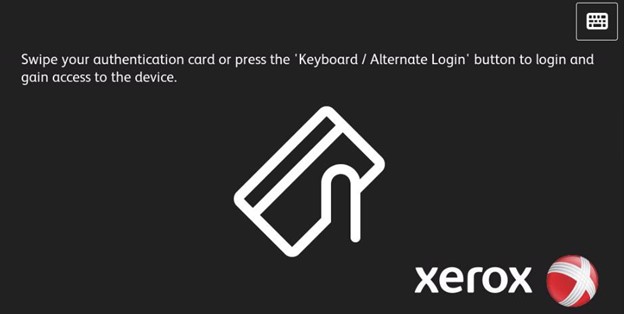
- 1. 'Tap' your MCLA Photo ID on top of the RFID Reader on the Copier.
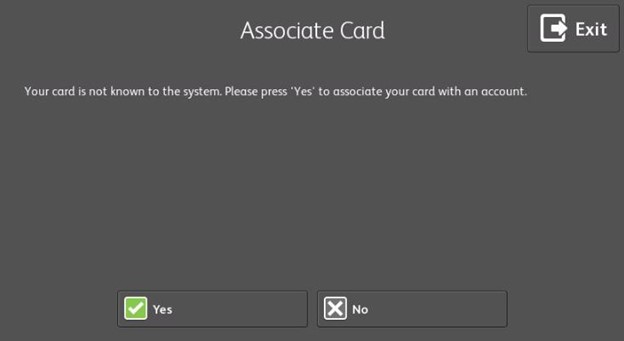
- 2. You will be prompted to “Associate your Card”.
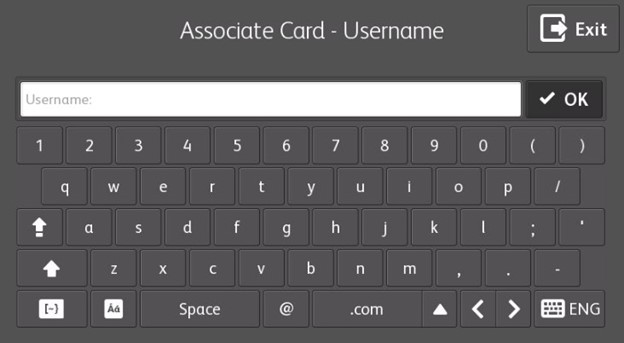
- 3. Select the “Yes” button in the right-hand corner to begin registration.
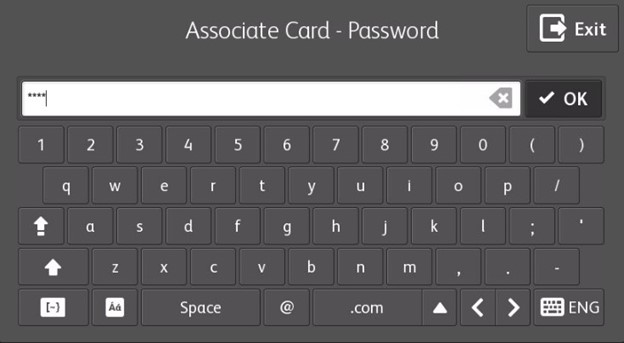
- 4. You will be prompted to enter your MCLA User ID (A number without @mcla.edu) and Password.
- 5. Hit the “Done” key in the right-hand corner after each item is entered.
- 6. Once complete your card will be “successfully registered”.
- 7. If the information you entered is not correct you will be prompted to try again.


