Difference between revisions of "Creating Self Signed Signatures in Adobe Acrobat Reader DC"
en>Helpdesk |
(No difference)
|
Revision as of 15:34, 3 November 2016
Before starting this process - you will need the following:
- Adobe Reader DC installed. This can be downloaded for free at https://get.adobe.com/reader/
- A scanned photo of your signature in .pdf, .jpg or .png format.
Once this is completed, you can move forward with creating a self signed signature in Adobe Acrobat Reader DC in Windows by following these steps:
Step 1: Import Signature
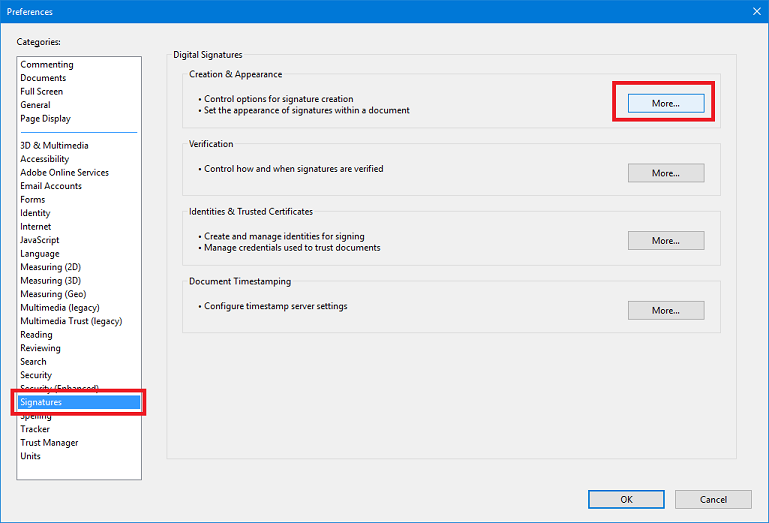
- Click on “Edit”
- Click on “Preferences”
- Click on “Signatures”
- Click on “More” within the “Creation & Appearance” area
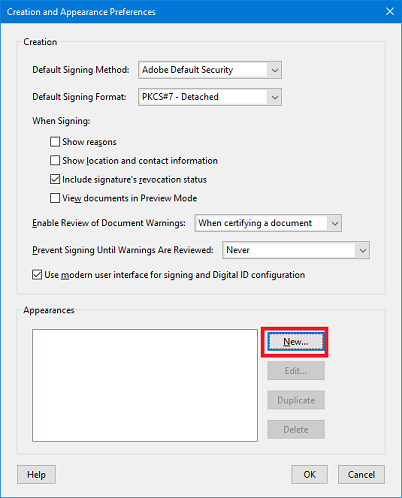
- Click on “New” within the “Appearance” area
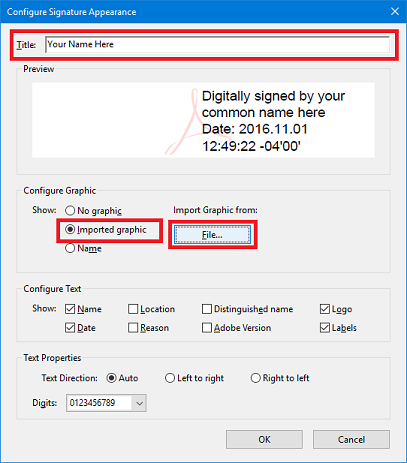
- Enter your name in the “Title” field
- Select “Imported graphic” and then select “File” then “Browse”. Select the .jpg/.png/.pdf file of the signature.
- Click ‘OK’
Step 2: Create Digital ID
- Click on “Edit”
- Click on “Preferences”
- Click on “Signatures”
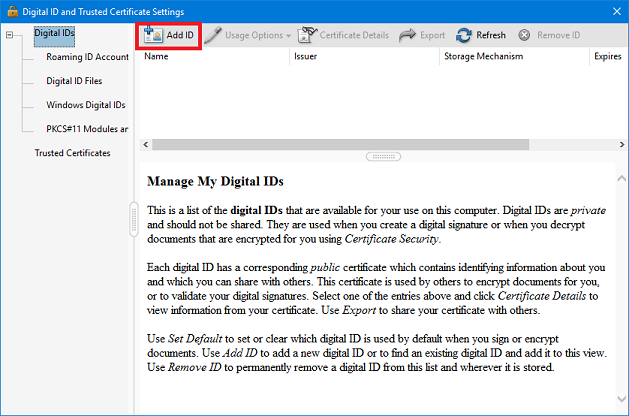
- Click on “More” within the “Identities & Trusted Certificates” area
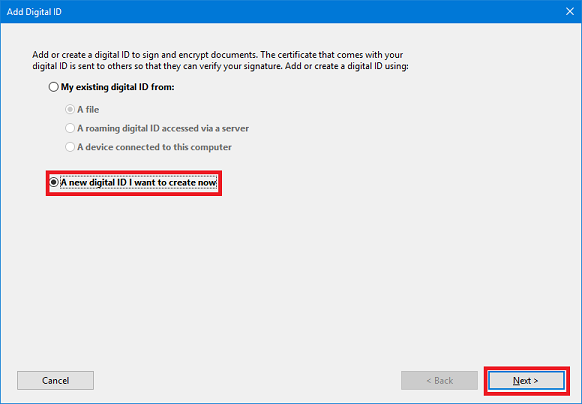
- Select ‘Add ID’
- Select ‘A new digital ID I want to create now’
- Ensure ‘New PKCS#12 digital ID file’ is select then click on ‘Next’
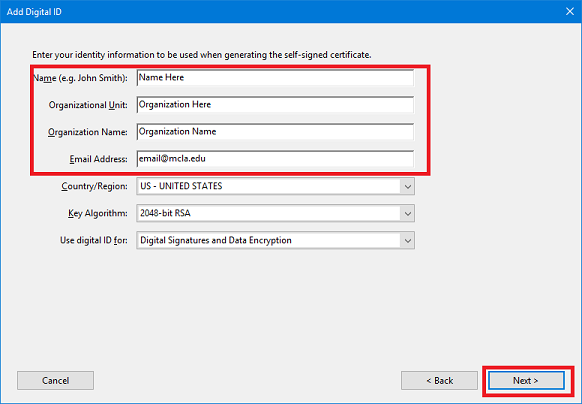
- Fill out the Name, Organizational Unit, Organization Name, and E-mail Address. Click “Next”
- Set a password to the signature in the Password field. Confirm the password and select ‘Finish’
Step 3: Using the Digital Signature
- NOTE: You will only be able to sign documents when a PDF file is opened directly in Adobe Reader DC. This option is not currently available when using the build-in PDF readers in web browsers. To ensure you are not opening the PDF file within the web browser - download the PDF file to your computer and open it directly in Adobe Reader DC.
- Click on the signature field you would like signed
- Select the Digital ID that was created
- Use the ‘Appearance’ drop down to select the signature picture
- Enter the signature password in the lower left corner
- Click ‘Sign’
- Save the signed PDF file.
