Difference between revisions of "Manual Printer Install on macOS"
en>Helpdesk |
(No difference)
|
Revision as of 19:08, 28 January 2019
To manually install an MCLA printer on macOS Sierra, these steps may be followed:
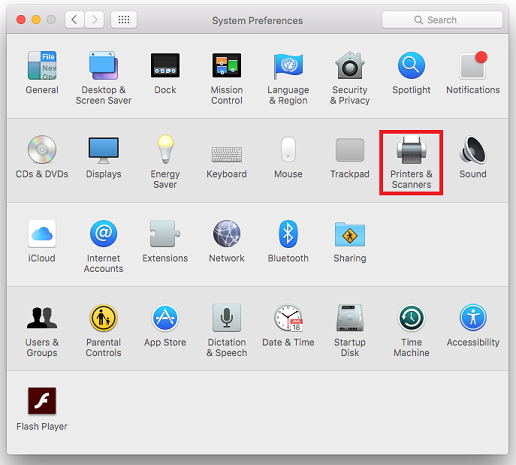
Open System Preferences and click on Printers & Scanners
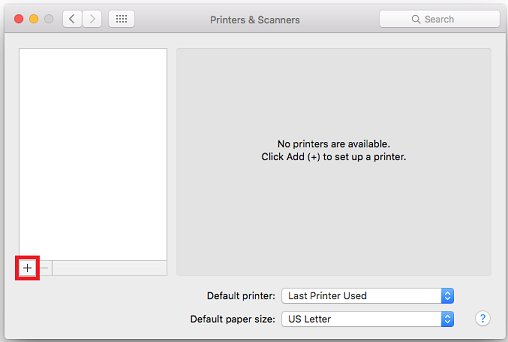
Click the + button to open the Add dialogue box
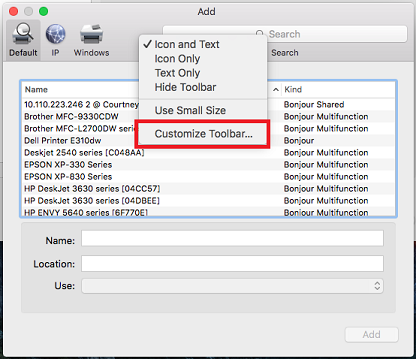
Once in the Add dialogue, control click or right click in the toolbar area and click Customize Toolbar...
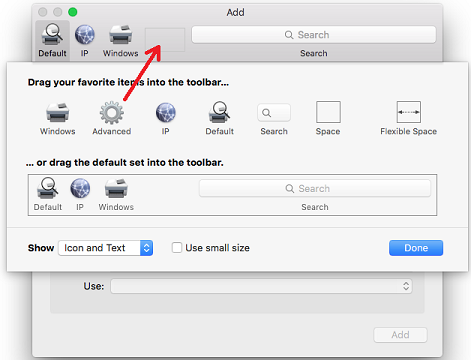
Click and drag the Advanced icon into the toolbar and click Done.
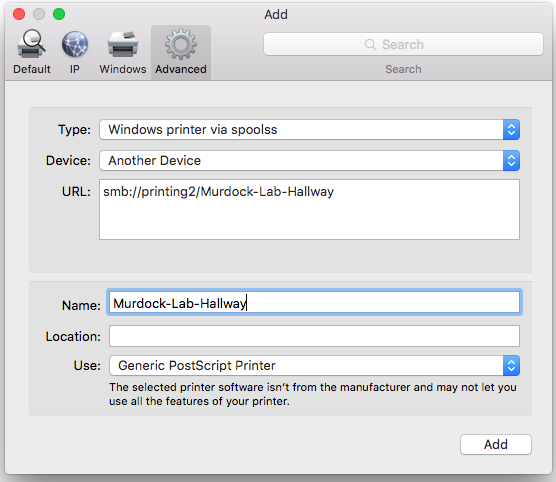
Click the Advanced icon in the toolbar. You can now configure the printer you wish to install.
Type should be Windows printer via spoolss
URL should be smb://printing2/ followed by the name of the printer. Some examples are:
smb://printing2/Murdock-Lab-Hallway
smb://printing2/Freel_1st_Floor_Circulation
smb://printing2/Freel-SecondFloor
smb://printing2/CSI_120_Laser
smb://printing2/CSI_218_Laser
smb://printing2/CSI_316_Laser
smb://printing2/CSI_308_Laser
Name should be the name of the printer.
Use should be Generic PostScript Printer
Once finished, click Add.
