Difference between revisions of "O365 - Set a Vacation/Auto reply Message"
en>A30097513 |
m (1 revision imported) |
(No difference)
| |
Latest revision as of 19:28, 27 January 2021
The following steps will show you how to set up an automatic reply in Microsoft Outlook.
- First, in Outlook, click the gear, or settings, icon in the top-right of the page to open your Outlook settings.
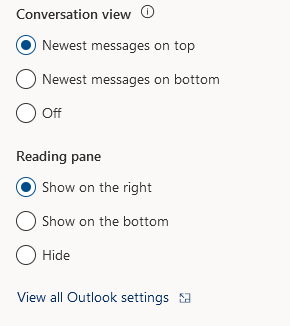
- At the bottom of the settings menu, click the link that says View all Outlook settings.
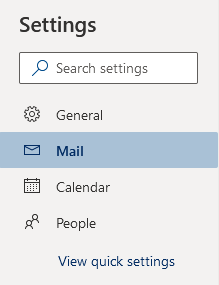
- A Settings window will open. On the left side of this window, underneath the Search Bar, click the Mail option.
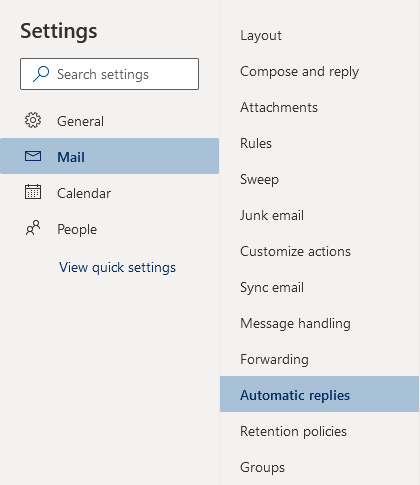
- To the right of the first list of options, click the Automatic Replies option.
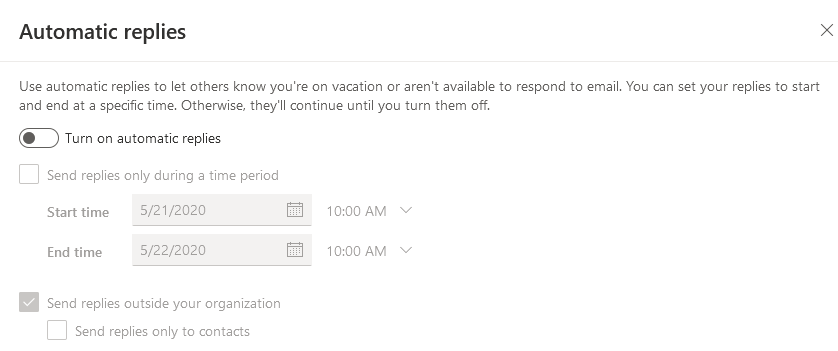
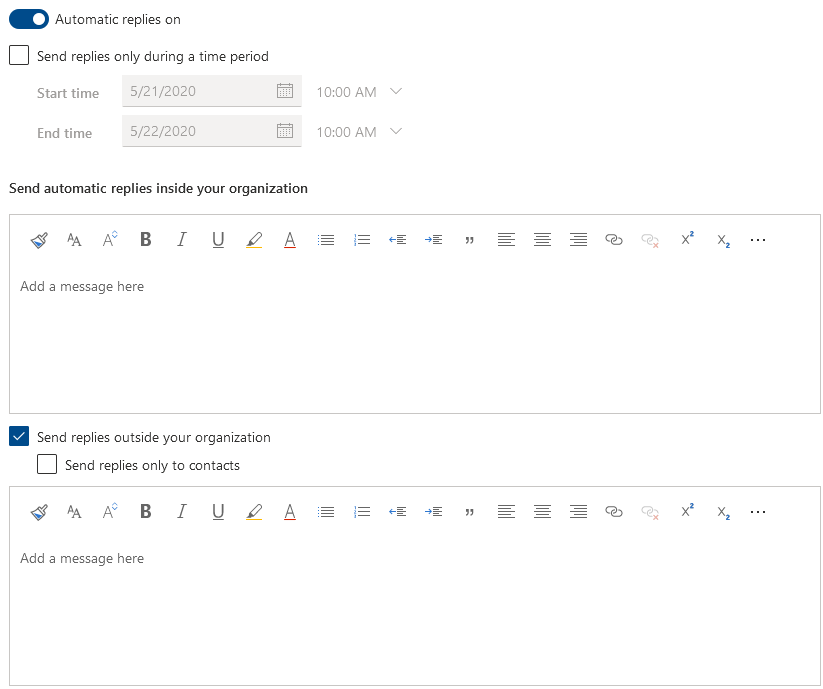
- Next, you will see the automatic reply menu.
- Make sure the button to turn on automatic replies is enabled. Once this is enabled, more options in this menu become available.
- Selecting the first check box allows you to specify a time period during which automatic replies are sent. You must choose a start date and an end date as well as a start and end time.
- Under the time period section, there are options relating to your calendar that you can enable or leave disabled. You can block your calendar for the specified time period. You can automatically decline invitations for events that take place during this time. You can also choose to decline and cancel any meetings during this time.
- The next section includes two text boxes. The first is where you create an automatic reply that is sent to other members of your organization.
- The second text box is where you create an automatic reply that is sent to those who are outside of your organization. You can choose to enable or disable replies to people outside of your organization. You can also choose to enable or disable the option to only send automatic replies to members of your Outlook contacts.
- To keep your new automatic reply settings, click Save at the bottom of the settings window. Otherwise, click Discard.

