Difference between pages "Conference Bridge Instructions" and "Configuring Outlook 2013"
(Difference between pages)
m (1 revision imported) |
en>StuHelpDesk |
||
| Line 1: | Line 1: | ||
| − | + | To configure a new installation of Outlook 2013 to work with your Office 365 email, the steps below should be followed. | |
| − | + | [[Image:Ol13icon.png]] | |
| − | + | *Double click the Outlook 2013 icon on your desktop to launch Outlook 2013. | |
| − | + | [[Image:Outlook11.png]] | |
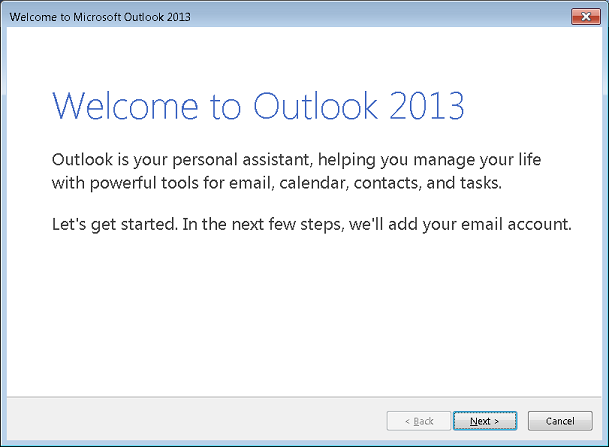
| − | + | *Click '''Next''' on the welcome screen. | |
| − | + | [[Image:Outlook22.png]] | |
| − | * | + | |
| − | * | + | |
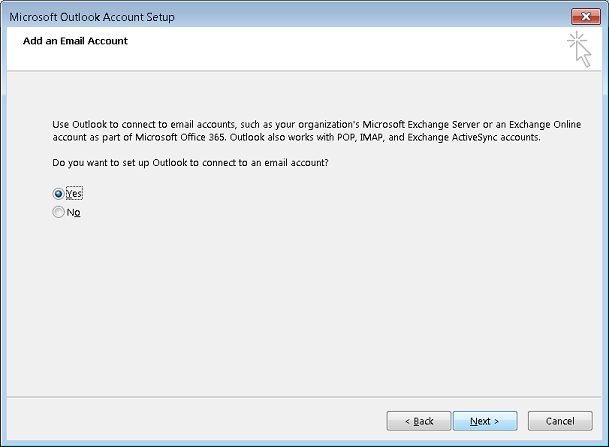
| − | + | *Ensure that the '''Yes''' radio button is selected and click '''Next''' on the Add an Email Account screen. | |
| − | * | + | |
| − | + | ||
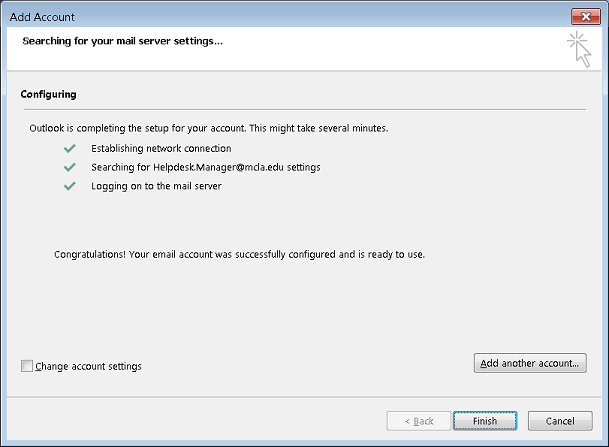
| + | *On the Auto Account Setup page, your information should automatically be populated. Click '''next''' to continue the setup process. | ||
| + | |||
| + | |||
| + | [[Image:Outlook33.png]] | ||
| + | |||
| + | [[Image:Outlook44.png]] | ||
| + | |||
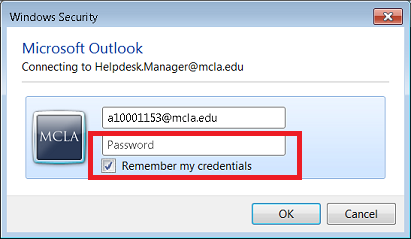
| + | *Outlook will prompt you to enter your MCLANET password. Once entered, ensure "'''Remember my credentials'''" is checked and click '''OK'''. | ||
| + | |||
| + | [[Image:Outlook66.png]] | ||
| + | |||
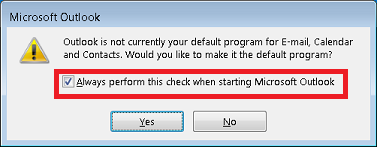
| + | When Outlook runs for the first time it will want to set itself as the default mail client. Click '''Yes''' to continue. | ||
Revision as of 16:51, 2 November 2015
To configure a new installation of Outlook 2013 to work with your Office 365 email, the steps below should be followed.
- Double click the Outlook 2013 icon on your desktop to launch Outlook 2013.
- Click Next on the welcome screen.
- Ensure that the Yes radio button is selected and click Next on the Add an Email Account screen.
- On the Auto Account Setup page, your information should automatically be populated. Click next to continue the setup process.
- Outlook will prompt you to enter your MCLANET password. Once entered, ensure "Remember my credentials" is checked and click OK.
When Outlook runs for the first time it will want to set itself as the default mail client. Click Yes to continue.
