How to Secure Print (Color)
Description
The following instructions are related to the color Ricoh copiers found on campus. These instructions allow the user to prevent the printer from printing out documents until they are present at the machine by setting a password with each print job. To do this you will need to make the following changes on your computer and at the copier.
Open Printer Properties
- The first step is accessing Printer Properties. Printer Properties can be easily accessed using one of the two following methods :
Through Windows Settings
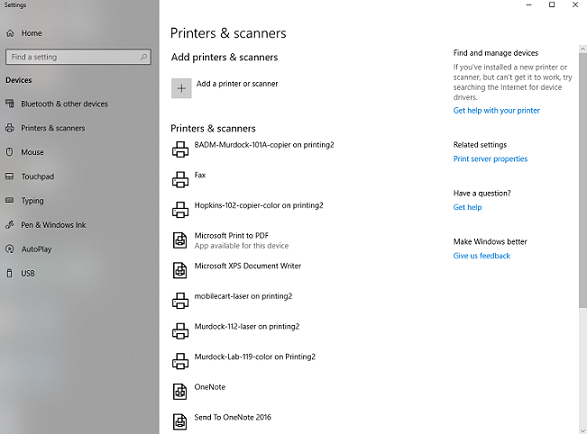
- 1. In Windows Search, search for Printers & Scanners. Click on Printers & Scanners.
- 2. Click on the printer you want to print to.
- 3. Click on the Manage button for the selected printer.
- 4. Click on Printing Preferences in the new menu.
Through Microsoft Word
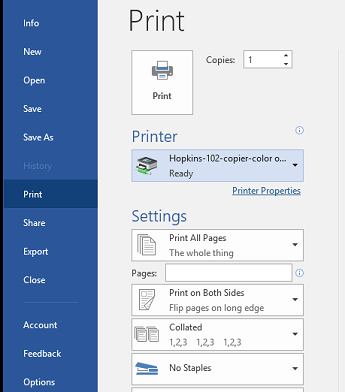
- 1. Open Microsoft Word.
- 2. Access the File menu, then select Print.
- 3. In the Printer drop-down, select the printer you want to print to.
- 4. Click Printer Properties found directly underneath the drop-down.
Secure Print Settings
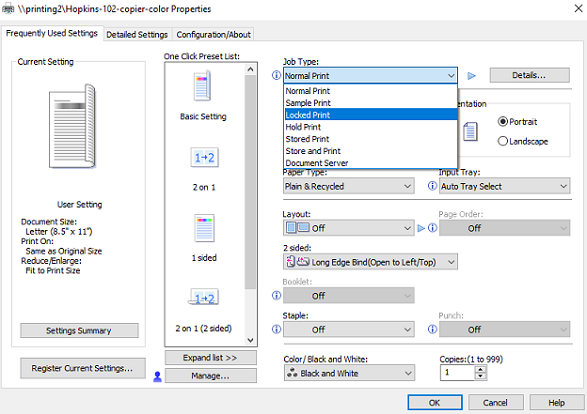
- This section will tell you the changes you need to make in the Printer Properties window.
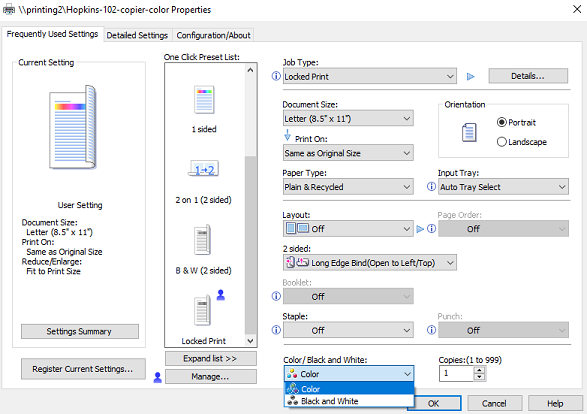
- 1. In the Job Type drop-down, select Locked Print.
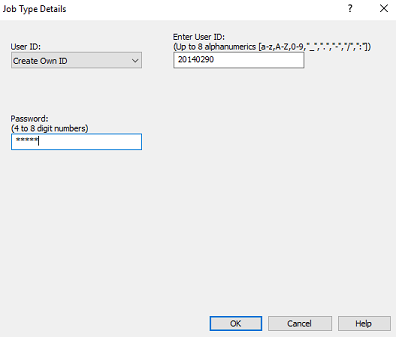
- 2. Click Details to open up the Job Type Details window.
- 3. The User ID drop-down should be set to Create Own ID
- 4. Enter an ID into the Enter User ID field. The suggested ID is your A# minus the A.
- 5. Enter a password into the Password field with the restrictions noted by the field.
- 6. Click OK to return back to the Printer Properties screen.
- 7. Go the Color/Black and White drop down, select Color.
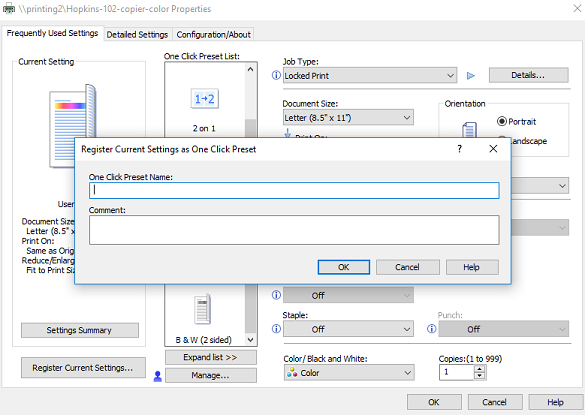
- 8. Click the Register Current Settings button to open up the naming field.
- 9. Enter the name "Secure Printing" into the One Click Preset Name field and then click OK.
- 10. In the One Click Present List there will now be an option called "Secure Printing". When attempting to secure print in the future you can just double click this option from the list. Click OK on the properties screen to close out of it.
After these steps the printer will now be set on your computer to do secure printing. If you wish to disable/enable secure print you do this by accessing the Printer Properties window and selecting Basic Settings to disable it or Secure Printing to enable it.
At the Copier
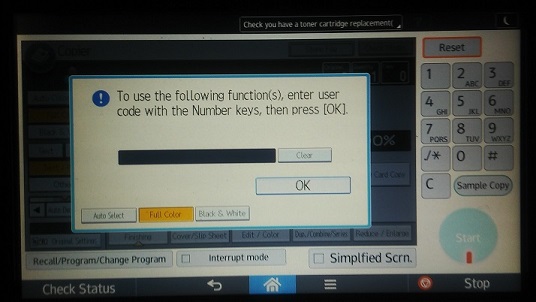
- 1. Each color copier will be locked by a unique department code. Once you are provided the code, you can enter it on the following screen using the touch pad to proceed.
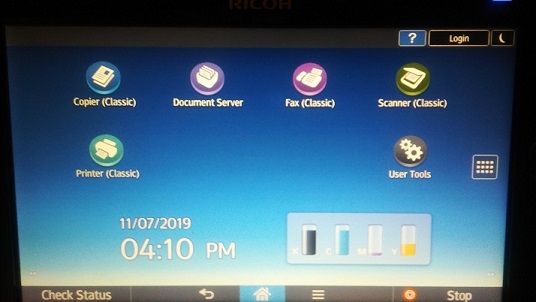
- 2. Click the blue home button located at the bottom middle of the touch pad to open the home menu.
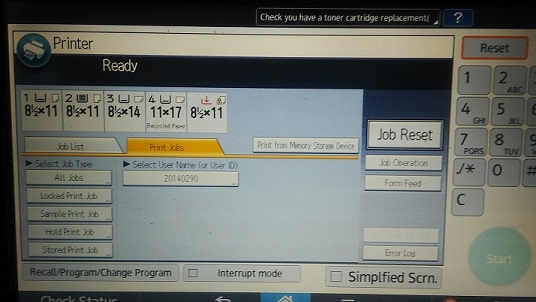
- 3. Click the Printer(Classic) button in the home menu to bring up the printer screen.
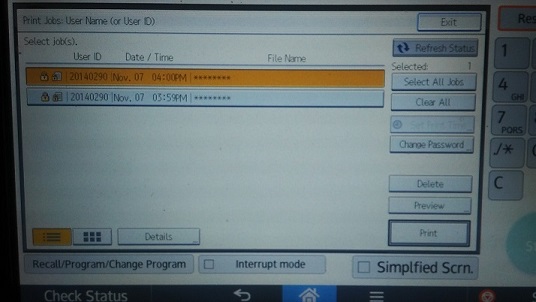
- 4. On the Printer screen, tap Print Jobs to open up the list of waiting users. The User ID (A#) you entered back on your computer will be displayed in the list. Tap your User ID in the list.
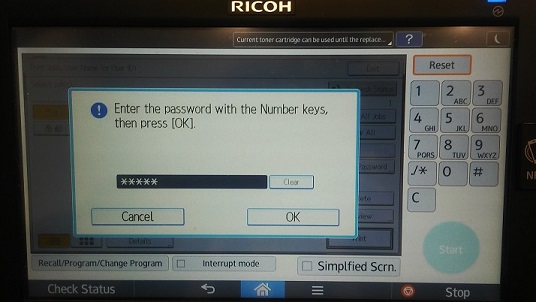
- 5. All secure print jobs associated with your User ID will be displayed in this list. Tap on the print job that you want to print out then tap Print. Doing this will bring up the enter password field.
- 6. Enter the password you associated with the User ID back on your computer then click OK. The Print Job will be removed from the list automatically and will proceed with printing normally.
The Copier will automatically lock itself once left alone so the user does not need to do anything to lock the machine again once they are done with it.
