Large-Format Printing
MCLA facilities large-format printing of 36x48” color posters for conference presentations, including the MCLA Undergraduate Research Conference. Printing is available for both faculty and students. Printing is done through an outside print vendor.
Important: Only faculty can submit requests for large-format printing. Students must submit via a faculty sponsor.
Contents
Large-Format Print Requests (Faculty Only)
- Complete training with Academic Technology prior to submitting requests.
- document creation
- effective presentation
- design principles
- Receive poster from student in *.pptx format.
- Submit *.pptx to using this form Large Format Print Request Form
- The Academic Affairs Office will receive the form and work with a print service to process your request.
- Completed items will be sent to the Mail Room for delivery to the requestor/department.
Important: Please allow at least 2 weeks after the initial request for the final product to be printed.
Creating a Poster Using PowerPoint 2019
- Open a New (blank) presentation.
- From the Layout button, select Blank layout.
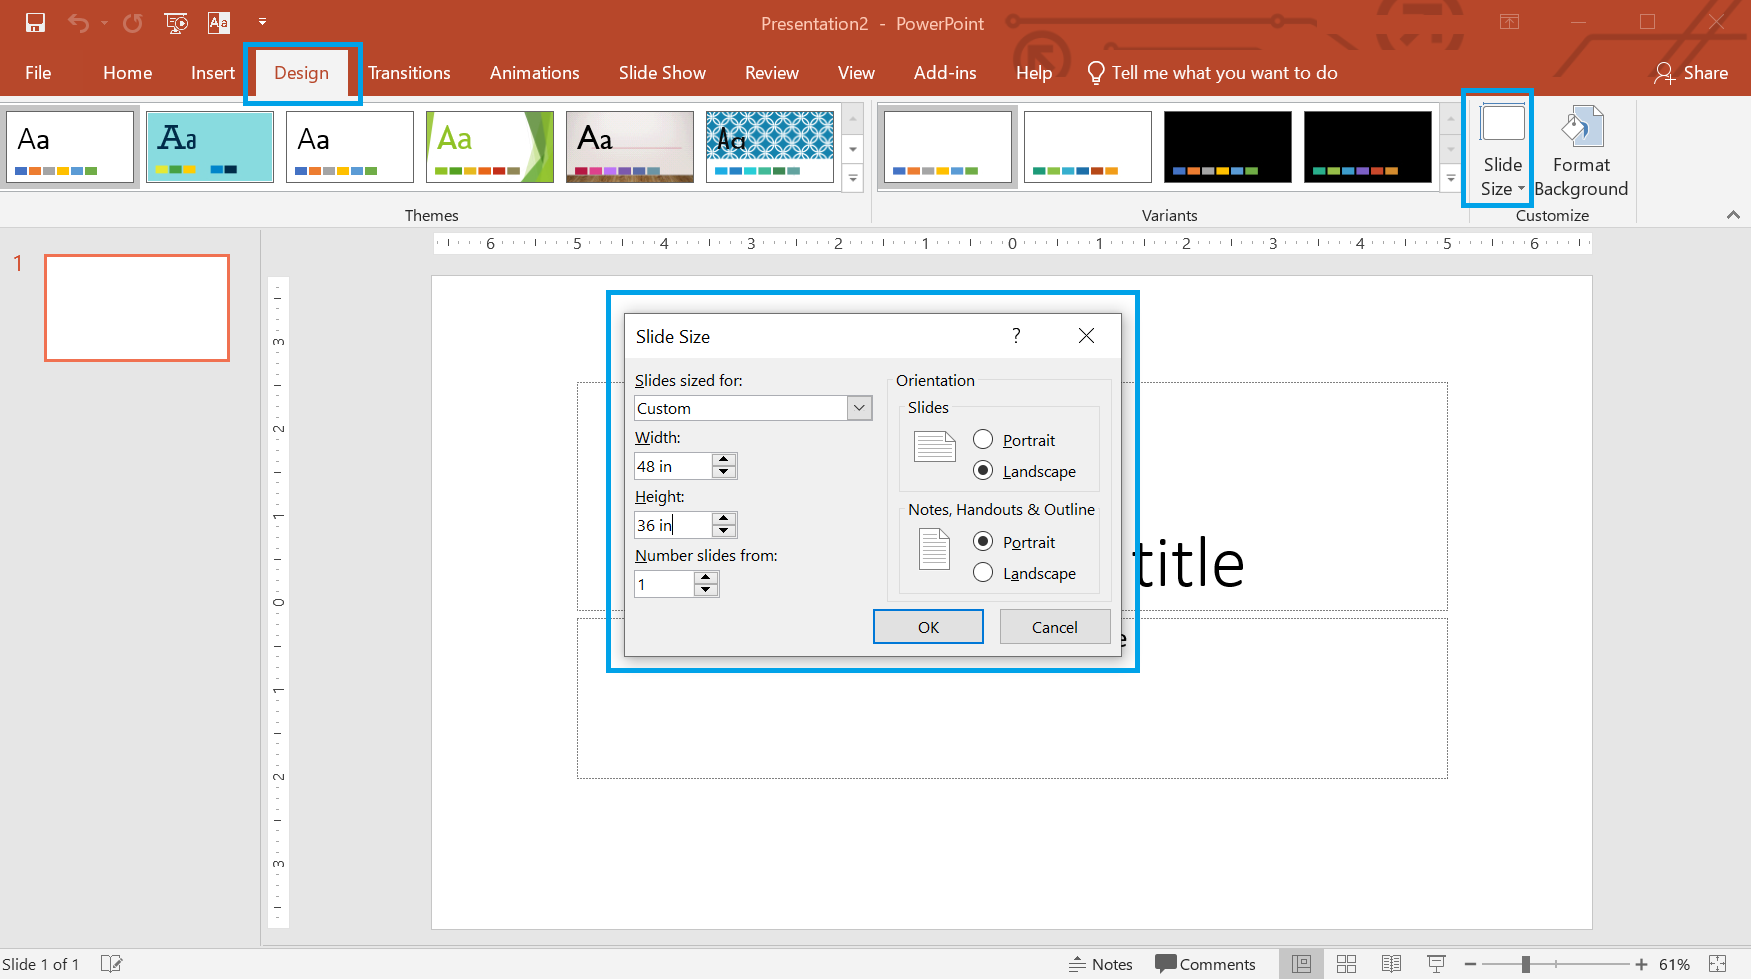
- From the Design Tab, select Slide Size and choose Custom Slide Size from the drop-down menu.
- In the Slide Size dialog box, choose:
- Slides Sized for: Custom;
- Width: 48 inches;
- Height: 36 inches;
- Orientation: Landscape.
- Add text boxes, graphics, and other content.
- Important: Know the conference requirements for poster size! Conference planners may have specific requirements. Confirm the poster size before customizing: although it is possible to adjust the size later in the process, it would require you to readjust every textbox, graphic, and font setting individually.
- Use text boxes to organize placement of your text and graphics. Highlight text to adjust font size, color and style.
- Use the various Image options on the Insert tab for simple line drawings, clip art, charts, shadows, 3-D effects, and other visual effects.
- Inserting a table or graph from another document:
- Open the original document where the table or graph was created.
- Copy it (CTRL+C for PCs, CMD+C for Macs).
- Click where you want to paste the copied table or graph and paste (CTRL+V for PCs, CMD+V for Macs).
- Save your poster by clicking the File Tab and selecting Save or Save As.
Design suggestions
- Background should be white or light-colored.
- Titles should use a sans-serif font (like Arial or Helvetica), 72-point.
- Subheadings should be 30-point.
- Text should use a serif font (like Times New Roman or Garamond), 24-point.
- Poster should use no more than two different fonts in all.
- Table/graph text should be no smaller than 18-point.
- Image resolution should be at least 150 dpi (dots per inch).
Additional Tips
- If you import text from your word processor (via copy and paste), you may have to change the formatting of the pasted text, which rarely survives the translation process unchanged.
- Keep a single folder for all text, objects, and images you will use in your poster, rather than maintaining them in several different folders. (This helps you keep track of your files.)
- Any image editing (e.g. in Photoshop) needs to be done before importing into the poster.
Important: Almost always, images from the web are very low resolution, unacceptable for large-format printing. For best results, verify that all images are a minimum resolution of 150 dpi or higher.